 |
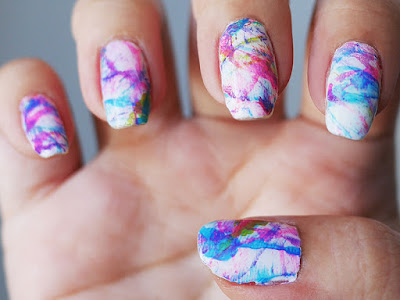
| [String nail art] |
But if you still want to read a tutorial, here's a simple one:
1. First, paint ten patches of nail polish as the base for your decals. I just paint them wherever nowadays.
2. Get thin semi-glossy magazine papers and sandwich the silicone nail art mat between them. Paint the end of a sewing thread with nail polish and put it on the patches of nail polish. Close the paper over the thread and mat, press down with one hand gently, then pull out the thread from between the paper and the mat.
3. You got your first pattern, now! It'll look something like the pattern below. Now keep going with your choice of nail polish, and repeat step 2 several times over.
Here are some progress shots as I layered on string art patterns:
Unfortunately, one nail patch did come off and stuck to the underside of the paper. I peeled it off the paper, stuck it back on to the mat with application of nail polish beneath the patch and kept going. It worked fine up to the last round, then it came off again because I hadn't given the fix enough drying time. It was still salvageable to be used on my pinkie finger since that one's so much smaller.
Peel off all the nail patches from the mat, apply base polish to your nails and then press on these nail patches. Remove any excess bits of nail polish and then seal it with a clear top coat. Then you get the following!
 |
| [String nail art] |
You can use any nail polish (although preferably, nothing quick dry for the string art parts). The nail polishes I used were:
- Essie Private Weekend
- Blue and green Elianto nail polishes
- LA Girl Hustle
- Australis Fairmont Fling
- Australis Pinot-Dah
Anyway, hope you enjoy and let me know if you try this out!


0 comments:
Post a Comment