Haven't done a comparison for a while - and here's an interesting one! Top coats!
 |
| [Battle bottles] |
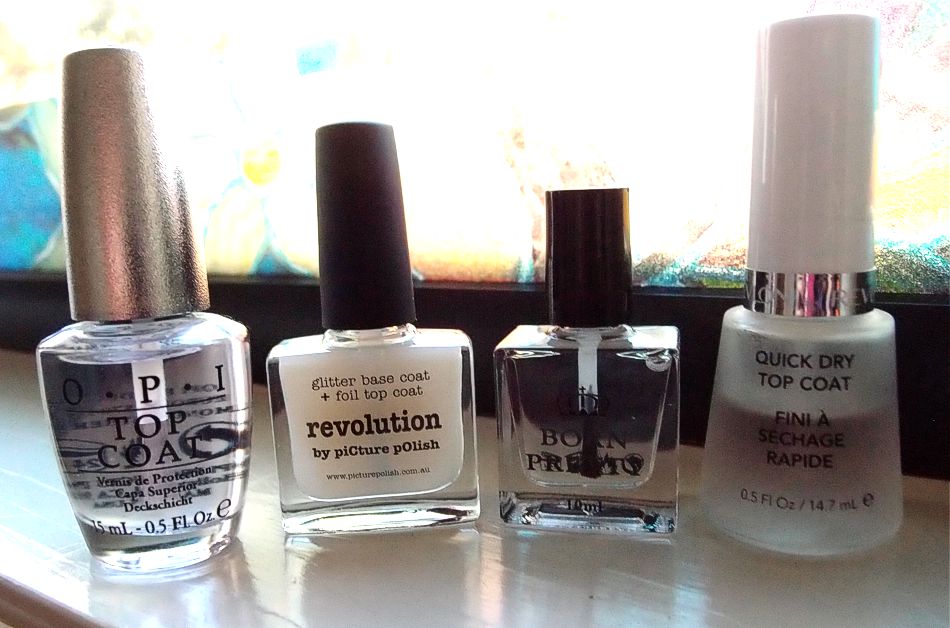
The topcoats I'm trying out today are from left to right: OPI Top Coat, Picture Polish Revolution, Born Pretty No Smudge Top Coat and Revlon Quick Dry Top Coat.
 |
| [Born Pretty No Smudge Top Coat] |
I recently received the
Born Pretty No Smudge Top Coat from
Born Pretty for review and I was super excited because in the item description, it is meant to work over stamping designs, holo/chrome powders and nail foil transfers! It comes in a nice weighty rectangular bottle of 10ml volume. The black cap actually comes off, as you can see in the first photo. I found it much easier to use with this off, as that suits my smaller hands better. I think you could leave it on during application if you prefer.
 |
| [Fiber Optics Nail Foil Transfer] |
As a challenge, I tried to pick out a super holo nail foil transfer from my collection; this one is called Fiber Optics. I'm not sure I picked the best one for the no-crinkle challenge in the end, but it's certainly super rainbows up in here... Above you can see the process of cutting out appropriately-sized rectangles for each nail...
 |
| [2 coats: Color Club Harp On It] |
As always, I picked a matching silver holo base since my foil transfer was a silver holo. This lovely is Color Club Harp On It from the Halo Hues collection. Both Jme and I have previously posted about this
here and
here, but I couldn't resist putting more photos of this beauty up. Ah~~
 |
| [Base: Color Club Harp On It (2 coats); Foil: Fiber Optics (pinky)] |
I know Harp On It is amazingly bling, but there's just something about holographic nail foil transfers. This photo doesn't even capture it properly but the holo shine with Fiber Optics is on a whole other level..
 |
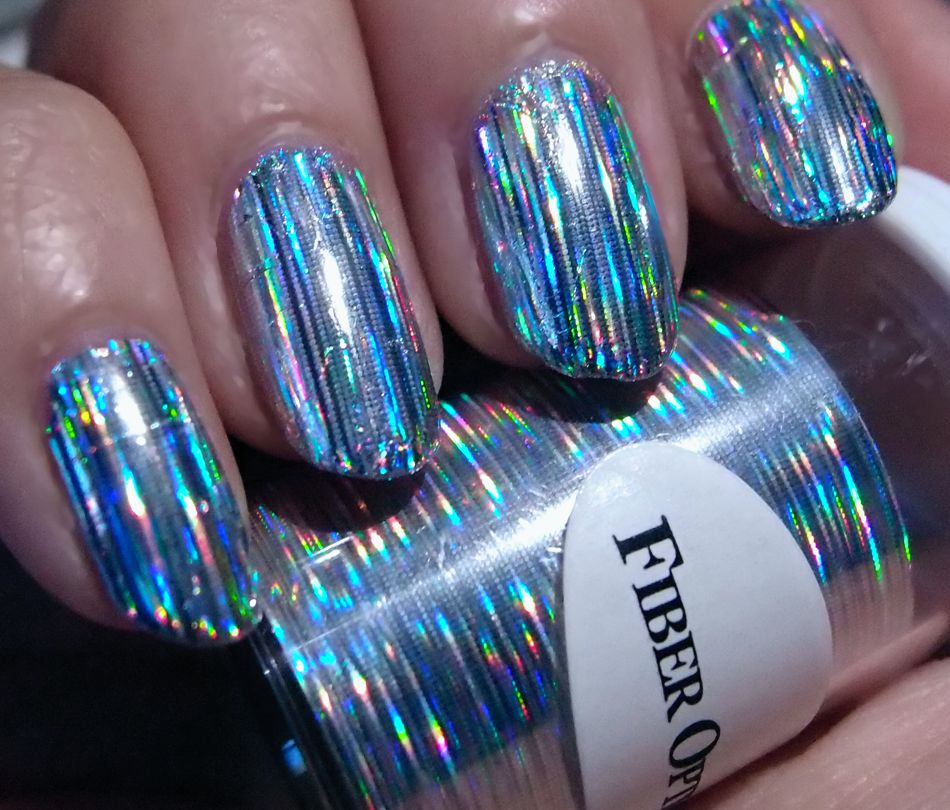
| [Nail foil transfer: Fiber Optics] |
So obviously, I have to have some photos BEFORE I put topcoat on, before any crinkly catastrophes occur. Check it out! These were so hard to photograph - they seriously look like some crazy techno robot nails under direct lighting.
 |
| [Nail foil transfer: Fiber Optics] |
Once more before topcoating....

 |
[Topcoat (L-R): Revlon Quick Dry, Born Pretty No Smudge, Picture Polish Revolution, OPI;
Nail foil transfer: Fiber Optics] |
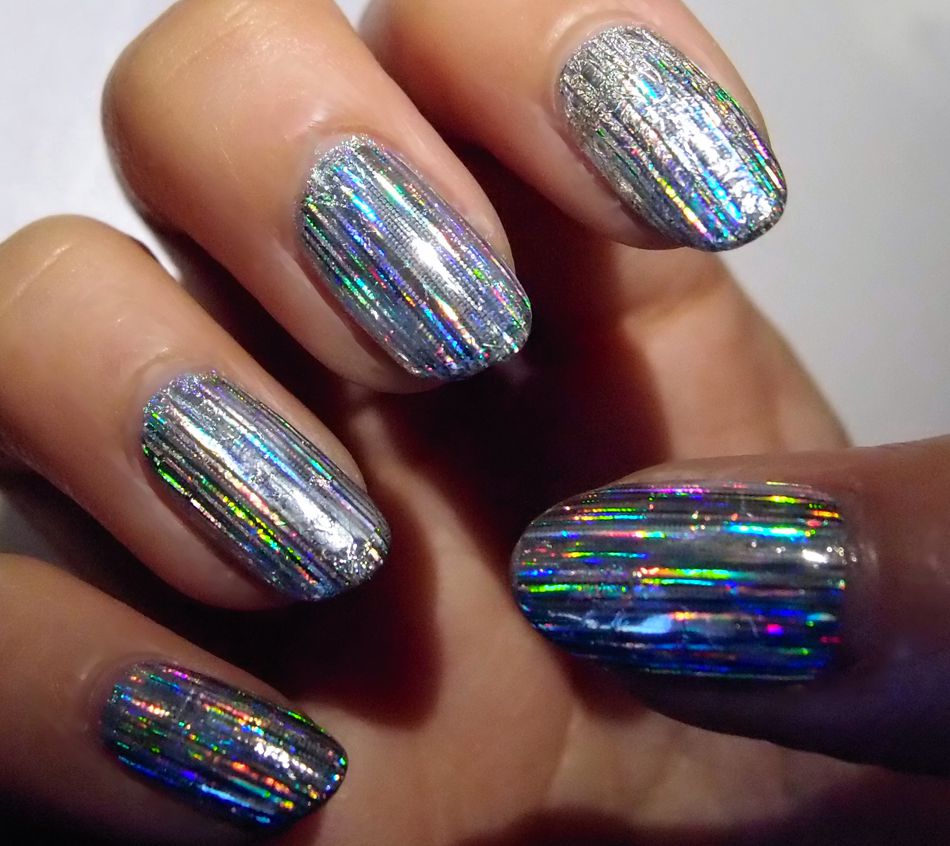
Et voila! So, there were a couple of surprises here. I'll list out what I used and the result..
Pinky: Revlon Quick Dry - I expected a quick-drying polish to leave a crinkly and dull finish but it only crinkled slightly and remained holographic.
Ring: Born Pretty No Smudge - No crinkling, good holo. Bling-addict approved!
Middle: Picture Polish Revolution - My positive control, so to speak. Also no crinkling, good holo!
Index: OPI Top Coat - Whoa, crinkle! Pretty much all crinkled, and patches of dullness. No bueno!
 |
[Topcoat comparison: Revlon Quick Dry (pinky); Born Pretty No Smudge (ring);
Picture Polish Revolution (middle); OPI (index); No top coat (thumb)] |
So basically, Revlon works in a pinch. OPI to avoid. Picture Polish Revolution and Born Pretty No Smudge Top Coat are both fine to use but one is also 1/3 the price of the other so if you're trying to save up (for more polish, I assume), then Born Pretty No Smudge Top Coat is the way to go.
I will note though that both topcoats from Born Pretty and Picture Polish feel tacky to the touch a bit longer than the Revlon and OPI. I don't think it's particularly long, I'm probably just used to the Quick Dry!
I mentioned above that I wasn't sure if I picked the most challenging foil transfer design - I truly expected more crinkling to happen! Well, that'll be an experiment for another day..
Again, you can purchase the
Born Pretty No Smudge Top Coat here, and check out the entire range at
Born Pretty. Code above also available for some savings off full priced items!







 Posts
Posts


