; Plisherrific

Feb 20, 2012

The Dupe Test - China Glaze Ruby Pumps, ORLY Star Spangled, Milani Ruby Jewels


Finally, I'm getting around to posting this dupe test! I took these pictures ages ago, then edited the pics a while ago, and now I'm writing about it~ Remember to click on the images for a closer look!

Ever since China Glaze came out with Ruby Pumps, an amazing red jelly with matching red glitter, several other companies have come up with similar versions. Today I have ORLY Star Spangled and Milani Ruby Jewels to compare. Let's take a look!

[In the bottle: China Glaze Ruby Pumps, ORLY Star Spangled, Milani Ruby Jewels (L-R)]
First, in the bottle. I think straight off you can see how glitzy Ruby Pumps is. The Milani is equally glittery but the glitter flecks although denser, are smaller and therefore you get a more even glow rather than glitzy flecks like in Ruby Pumps. ORLY Star Spangled is falling behind in the glitzy stakes, oh no! It also appears just slightly cooler than the other two.

[In the bottle: China Glaze Ruby Pumps, Milani Ruby Jewels, ORLY Star Spangled (L-R)]
A closer look at the glitter flecks. NOTE: I have switched the order around (because the Milani bottle was skinnier, I put it in the middle...) Same observations as above, much more obvious glitter in Ruby Pumps, much denser in Milani, ORLY falling behind...

Now on to the swatches!

[One coat: China Glaze Ruby Pumps, Milani Ruby Jewels, ORLY Star Spangled (L-R)]
At one coat, you can easily see the jelly finish on all three. Milani Ruby Jewels is lighter in colour than the other two. I don't mean less opaque, it just is of a slightly brighter red shade while China Glaze Ruby Pumps gives the deepest colour.

[Glitter flecks: China Glaze Ruby Pumps, Milani Ruby Jewels, ORLY Star Spangled]
In the shade so the flecks stand out. Glitter is larger and most dense in Ruby Pumps. Ruby Jewels is pretty dense but because the flecks are smaller, it isn't as glittery. ORLY is not doing too bad actually.

[Two coats: China Glaze Ruby Pumps, Milani Ruby Jewels, ORLY Star Spangled (L-R)]
Two coats, the colour deepens beautifully on Ruby Pumps. The reason it's so gorgeous is because the colour deepens but the glitter still remains shiny. You can see that Milani Ruby Jewels is definitely a brighter shade than the other two. ORLY Star Spangled is somewhere in between the two, but closer to Ruby Pumps.

[Glitter flecks: China Glaze Ruby Pumps, Milani Ruby Jewels, ORLY Star Spangled (L-R)]
Another look at the glitter flecks. Milani Ruby Jewels is obviously most dense, ORLY Star Spangled the least.

[Two coats: China Glaze Ruby Pumps, Milani Ruby Jewels, ORLY Star Spangled (L-R)]
In slightly different lighting. You can see how the darker shade in the China Glaze makes the red glitter flecks extra glitzy, whereas it's so dense in the Milani that you get an overall  glow instead.

Once again the ORLY falls in between, although to be honest, my index finger which is what I painted the ORLY on is very curved and doesn't show off the glitter as well.

[Three coats: China Glaze Ruby Pumps, Milani Ruby Jewels, ORLY Star Spangled (L-R)]
At three coats, it's as good as it gets. ORLY is pretty close in colour to Ruby Pumps, Milani is super glitzy but a brighter shade of red.
 
[Glitter flecks: China Glaze Ruby Pumps, Milani Ruby Jewels, ORLY Star Spangled (L-R)]
Looking at the glitter, it's as I wrote before - Milani has the most dense glitter of the three,.

[Three coats: China Glaze Ruby Pumps, Milani Ruby Jewels, ORLY Star Spangled (L-R)]
Tada! Final image... there's only so many times I can repeat myself, hehe.
So let's sum up what we've learnt so far:-

COLOUR:
China Glaze Ruby Pumps: The deepest colour, very luxe.
ORLY Star Spangled:
Closest to Ruby Pumps.
Milani Ruby Jewels: A brighter shade of red than the other two.

GLITTER:
China Glaze Ruby Pumps: Very shiny glitter flecks, medium density of the three.
ORLY Star Spangled: Least dense of the three and less shiny due to this.
Milani Ruby Jewels: Most dense and extremely shiny, but more glowy than glitzy due to this.
 
- SO WHAT'S THE VERDICT? -

ORLY Star Spangled: A fairly good dupe, but in terms of pricing, although you do get more in a bottle with ORLY, it does cost more and you'd be better off spending your cash on China Glaze for the "real thang". Although if you already own Star Spangled, you don't REALLY need Ruby Pumps (but I sure want it anyway!) Check out a previous mani done with Star Spangled here!

Milani Ruby Jewels:
Not so much a dupe, but amazing in it's own right. This is one shiny polish! It's a bit more festive because of the brighter colour - in fact, when I asked someone which they liked best, they picked the Milani, so it comes down to colour preference.

And there you go! That's the low down on our contenders this week. =) I hope you all enjoyed it - if you have any more questions about these, feel free to leave a note in the comments! Also, if you have any suggestions on how I could improve dupe posts, I'd love to hear them too!


Feb 16, 2012

Changing Skies - BYS Color Change Glitter Blue

I'm on the road right now, so I was digging around my old photos for nail pictures when I found this. I'm going to keep it simple for the next couple weeks, and this polish is simple and pretty.

[Three coats: BYS Color Change Glitter Blue]
BYS Color Change Glitter Blue dries matte. It has a scattering of white/silver glitter, and it is a pale blue when warm, medium blue when cool. I really love this polish because it's such a delicate blue, and I find that this polish changes colours really easily. If you have longer nails, it looks like a sweet blue French manicure.


[There coats: BYS Color Change Glitter Blue]
 I washed my hands in cold water so you can sort of see how the polish looks when the colour changes.


[BYS Color Change Glitter Blue with Revlon Quick Dry Top Coat]
I like the polish better with a clear topcoat over it to make it glossy.

That's it for today!

Feb 13, 2012

Shabby Chic Roses - Milani Sweetest Pink, Essie Matte About You, Water decals + Dried flowers


Well, I don't really celebrate Valentine's Day much, but I thought I'd better make a somewhat-appropriate post! So here's a basic manicure jazzed up with a choice of water decals or dried flowers.

[Bottle to nail: Milani Sweetest Pink (2 coats)]
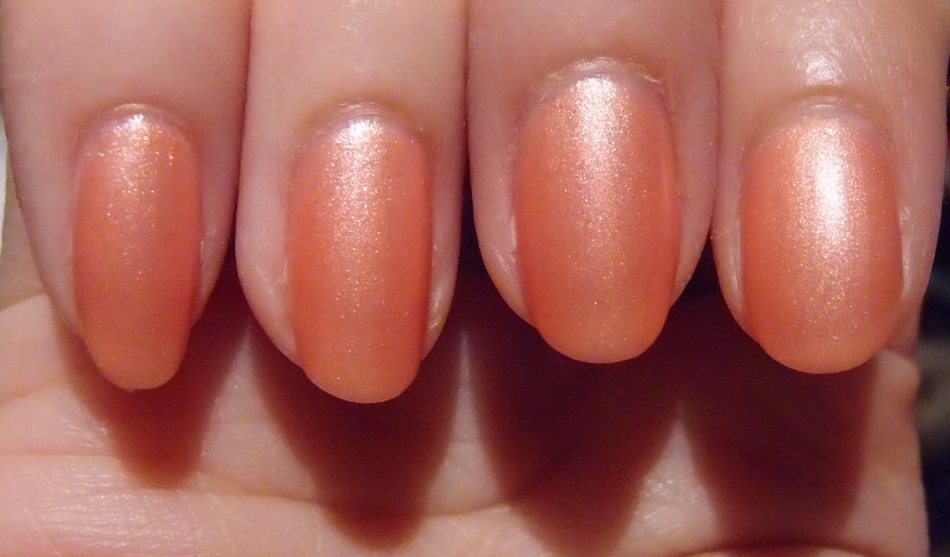
I started with a base of Milani Sweetest Pink - I don't often wear pinks usually, especially not lighter shades, but this was a lovely surprise. It is a peachy shade of pink with subtle silver shimmer and it's also opaque in two coats! It's not streaky nor frosty at all because the shimmer is more microglitter almost.

[Milani Sweetest Pink (2 coats) + Essie Matte about You (1 coat)]
Because of the slightly metallic look, I thought it would look amazing with a matte topcoat and I wasn't wrong! I added a coat of Essie Matte about You over the top and got this lovely pink brushed metal look.

[Milani Sweetest Pink (2 coats) + Essie Matte about You (1 coat)]
It looks like an updated mannequin manicure almost. Very smooth and subtle shimmer.

[Milani Sweetest Pink + Essie Matte about You + Rose water decal]
I then had these pretty shabby chic rose water decals that I purchased off eBay a while ago so I tested one out. I'm pretty happy with how it looks! It was a bit glossy originally, but another coat of Matte about You and it blended in perfectly.

If you've never used water decals before, it's super easy - just cut your pattern out as close to the design as possible, then put the whole thing in some water. The paper backing will come off leaving the thin film with the design on it. This is then placed on the nail while wet. You can move it around as you like while wet but it adheres to the nail once dry. You can even purchase printable water decal sheets to create your own patterns!

[Milani Sweetest Pink + Essie Matte about You + Rose water decal + Dried flowers]
It was an experimental sort of day so I also tested some dried flowers which I composed and then placed on the nail with the help of some clear nail polish, then topcoated over to hold in place. I think they would look great with a different basecoat colour... but that's an experiment for another day!

That's it then, I hope everyone has a great Valentine's whether you celebrate it or not!


Feb 9, 2012

Hexes on Bars - Color Combos CTW 507, The Skin Food BW701

So I'm buying all these random polishes I have never tried before and I just must share!

[The Skin Food BW701]
The Skin Food BW701, a Korean nail polish, is a velvety black with a silvery shimmer. What's strange is that in the bottle, I can see blue and pink microglitter too, but they aren't visible on the nail. While a pretty black, the polish is actually a little goopy and hard to deal with sadly. I do have a couple other polishes from the same brand and they all vary in quality.


[Color Combos CTW 507]
There was another polish I really wanted to try out; Color Combos CTW 507. I have never heard of Color Combos before but I found this in SaSa for around AUD1.30 and the label says it's made in France. CTW 507 has tiny hexagonal and bar glitter in a light purple jelly base.


[Top: Two coats of Color Combos CTW 507
Base: One/two coats of The Skin Food BW701]
This is Color Combos CTW 507 layered over The Skin Food BW701. Aaah, I can't stand it, the polish is so pretty! The purple jelly doesn't show up against black, but interestingly enough, I did a quick and dirty swatch of CTW 507 over pink polish, and it does give the pink a purple hue. I'll swatch that properly when I have the time.

The glitter has a blue-green-gold trio-chrome, which is really eye-catching. I think the different shaped glitter makes the mani really stand out.

[Top: Color Combos CTW 507
Base: The Skin Food BW701]
Multiple angles to show off the pretty hues! I didn't need a topcoat over CTW 507. It dried smooth and shiny.

I really like this polish, and I think it's a great buy. I wish I had gotten more Color Combos while I was at the shop!

Feb 6, 2012

Think Pink - Maybelline Wet Shine Cuddle Me Mauve, Tropez Super Pearl Pretty Pearl + Tahitian Pearl


Sorry! I was a little busy this week so it's an old one, and a short one!

This is a pink-based sponge gradient manicure that I did last year. Check out Jme's helpful post on sponge gradients here~ =)

[Gradient manicure (cuticle to tip): Maybelline Cuddle Me Mauve, Tropez Pretty Pearl, Tropez Tahitian Pearl]
I started with a base of Maybelline Wet Shine in Cuddle Me Mauve. I really love the finish of Wet Shines but unfortunately I only own just the one. This is a dusty pink creme with fine pale gold shimmer through it - gorgeous!
[Cuticle to Tip: Maybelline Cuddle Me Mauve, Tropez Pretty Pearl, Tropez Tahitian Pearl]
I then sponged from about the halfway point to the tip with Tropez Super Pearl in Pretty Pearl, a fairly bright pink shimmer. I didn't really have a good mid colour for this gradient so I sponged Pretty Pearl on quite sparingly so that Cuddle Me Mauve was still peeking through quite a bit.

[Cuticle to Tip: Maybelline Cuddle Me Mauve, Tropez Pretty Pearl, Tropez Tahitian Pearl]
Finally, I topped off the tips with Tropez Super Pearl in Tahitian Pearl - a reddish-copper pink shimmer.I really like how the shimmers in each polish add to the continuity of the gradient, from the pale gold to the copper-orange at the tips.

I'll have to find some time next week to edit all the photos I've been taking of more recent manicures - I've also been experimenting with a lot of different nail art techniques... but that's something for future posts! ;)

Feb 2, 2012

Red Treasures - L'elan Vital Red Crackle, The Face Shop GL111

I'm still on vacation and will be for awhile yet, but I intend to continue posting new pictures during this holiday.

As I'm travelling, I actually don't have access to my usual nail polish collection, but I did bring along The Face Shop's GL111, because a shiny gold foil goes with most outfits and occasions, in my humble opinion. :P

I'm visiting my parents, and my mum does have a modest collection of nail polishes. One of them is a recent purchase from Cosway, and it's the L'elan Vital Red Crackle.
[L'elan Vital Red Crackle: Click on the picture for a link to the product.]
The L'elan Vital Red Crackle doesn't actually have a product name, but the product number is 92219. This Korean product is a really easy crackle to use. It dries really fast, and cracks beautifully really fast as well. You won't have time for more than one coat, so make it count. As usual, a thicker coat will produce larger cracks, while a thinner coat will give you finer but more cracks. The red actually dries as a dark pink, but if you go over it with a topcoat, it becomes a deep red that matches the polish in the bottle.

[Base: The Face Shop GL111
First coat: L'elan Vital Red Crackle 92219
Tips: The Face Shop GL111]
The quality of my photos are a little dodgy right now, as I try to find the best spot to photograph my nails in this new location. I do miss my balcony and my billowing white curtain!

There are a number ways to do this manicure. I started with a base coat of GL111, the gold foil, and then went over everything with the red crackle. Then I did the French manicure tips with GL111 by free hand. You could also just tape over your tips when applying the red crackle to achieve the same outcome, I believe.

The only difficulty I faced was that I had to start the gold tips further into the nails than I prefer, because of where the red polish had randomly cracked.

[Base: The Face Shop GL111
First coat: L'elan Vital Red Crackle 92219
Tips: The Face Shop GL111]
These pictures were taken about a week after the manicure was applied, so there is some tip wear seen here.

[Photo taken with an iPhone]
Photos with my iPhone are always that little bit blurrier or grainier, but the positives is that the iPhone camera captures shininess so much better due to the slight blurriness in the photos. :P

I have bought a heap load of new polishes here in Penang, so do hang around for more of that next week!