; Plisherrific: May 2019

May 31, 2019

Southern Cross - Born Pretty Elope to Moon, Born Pretty Gel Polish Top Coat, Born Pretty Black Gel Polish, EpicNail Gel Polish Base Coat

We were sent a few items for review, so let's get to it!

[Born Pretty's Magnetic Stick Multi-function Magnet for Cat Eye]

This is Born Pretty's Magnetic Stick Multi-function Magnet for Cat Eye, which can be used a few different ways.

[Left to right: Born Pretty Elope to Moon,
Born Pretty Gel Polish Top Coat, and Born Pretty Black Gel Polish]
Hah, okay, the boxes to the right are empty, I don't have that many nail polishes for review! xD I just wanted to show the packaging looks. From left to right, I have Born Pretty's Elope to Moon from their Magnetic Gel Polish Starry Sky collection, Born Pretty's gel polish top coat and black gel polish. Elope to Moon is a purplish-gray magnetic gel polish. 

[Left to right: Born Pretty Elope to Moon, Born Pretty Gel Polish Top Coat,Born Pretty Black Gel Polish, and EpicNail Gel Polish Base Coat]
We didn't get a gel polish base coat so I'm using EpicNail's base coat here.

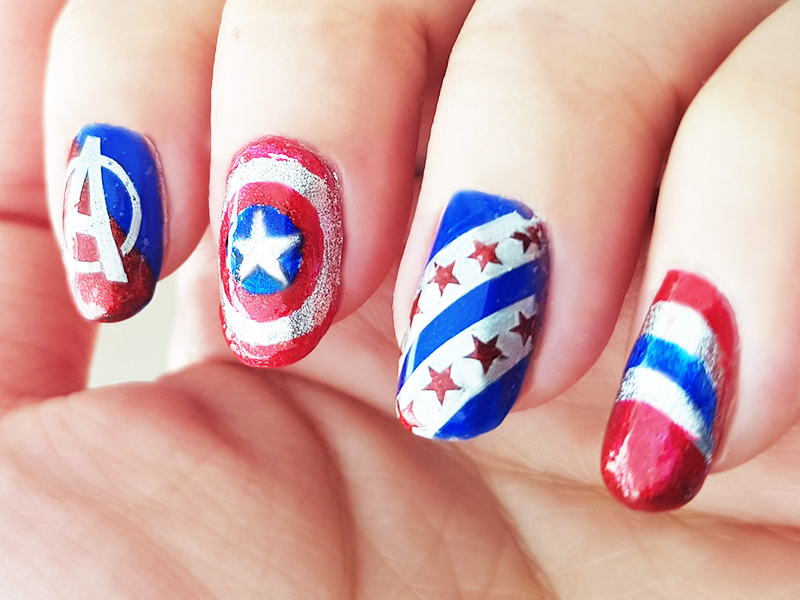
And here are the results! Tada!

[Born Pretty Gel Polish Top Coat, Born Pretty Elope to Moon, 
Born Pretty Black Gel Polish, and EpicNail Gel Polish Base Coat]

First, I want to say right off the bat that magnetic nail polishes and gel polishes are all my weaknesses. As in, I'm really bad at applying them. So that this turned out so well is a real surprise to me!

I have to say that Elope to Moon turned out more silver, with no hint of purple, but otherwise, I really like how it looks. Everything cured easily and the result was a glossy smooth finish. The magnet was fun to play with. If you check out the page on Born Pretty, you can see all the various patterns you can get depending on how you hold the magnetic stick to your nails and where you position the stick too. The cross effect was produced really easily and so was the half moon look. I wanted to make a stripe down the middle of my index finger, but I kept shifting the stick to try to sharpen the look and instead, diffused the whole thing, oops. The little finger has a kind of glowy triangle shape to it, but the top edge fades away a bit depending on how you angle your finger. On my thumb, there are two stripes, which again, depends on how you position the stick.

You can actually do all kinds of patterns, even more than what BP shows you, by experimenting with the magnetic stick and using more than one end on the same nail. Go wild! The magnet on this is so strong that it had much more of an effect than what I'm used to, which is why I really like it. Usually, I struggle to get any pattern with magnetic sticks.


As always, you can use our code when shopping at Born Pretty!

May 27, 2019

Noble Blossom - China Glaze Golden Opportunity, Hit the Bottle As Black As Night, Fireball, Born Pretty Chinese Style L005


I'm pretty stoked with today's stamping mani! Check it out!

[Chinoiserie]
I think peonies just may be my favourite flower, and this chinese-themed design is just gorgeous!

[Born Pretty Chinese Style L005]
The plate I am using was provided for review by Born Pretty and it's called Born Pretty Chinese Style - L005 - you can find it here! I love the designs on here so much! Not just the full nail designs, but also the little details in the top half of the plate, so gorgeous!

[Bottle to nail: China Glaze Golden Opportunity (1 coat)]
My base from last week - China Glaze Golden Opportunity, a one-coater (!) yellow shimmer.

[Base: China Glaze Golden Opportunity (1 coat); Plate: BP Chinese Style L005;
Stamping: Hit the Bottle As Black As Night; Fireball (leadlighting)]
You can see the design I picked on the bottom leftmost side. I stamped in black with Hit the Bottle As Black As Night, then painted over the peonies with Hit the Bottle Fireball - a red jelly polish specifically translucent for leadlighting. It worked a treat!

[Base: China Glaze Golden Opportunity (1 coat); Plate: BP Chinese Style L005;
Stamping: Hit the Bottle As Black As Night; Fireball (leadlighting)]
This was so quick and easy to do, and you can see how the fine leaf and stem details transferred perfectly as well.

Remember to check out the plate here, and our usual code above is available if you're going shopping at Born Pretty. Happy stamping! =)


May 20, 2019

Sunny Days - China Glaze Golden Opportunity


I've had this one for ages and I wasn't going to give it a post of it's own, but after searching through our archives, turns out I haven't reviewed it?? So here we go~

[Bottle to nail: China Glaze Golden Opportunity (1 coat)]
This is China Glaze Golden Opportunity. It's a yellow with silver shimmer, giving it an interesting sheen. It's not completely buttercup yellow, more a muted shade.

[1 coat: China Glaze Golden Opportunity]
Yellow polishes (especially creme ones!) tend to be hard to work with, drying streaky and the like. However, I think a neat trick is incorporating shimmer into it, for some reason, that formula works a lot better.

[1 coat: China Glaze Golden Opportunity]
Can you believe these photos are of ONE COAT? No topcoat even. I was pretty impressed! I think you can vaaaguely see visible nail line in the photos, but it's really not noticeable to the eye. (My natural nails are crazy long at the moment...)

[1 coat: China Glaze Golden Opportunity]
Such a good little workhorse! I was just rummaging for a good yellow base for a stamping design I wanted to try out, but I thought this one deserved a post of its own!


Desert Drive - Hit the Bottle As Black As Night, Chi Chi, Ulta3, Born Pretty Geometry L002


Today I'm going to be showing what I stamped over last week's gradient mani!

[Rolling dunes]
For once, I decided to stamp alternate fingers instead of all of them.

[Born Pretty Geometry L002]
Here's the plate I'm using today, generously provided for review by Born Pretty. This plate is called Geometry - L002 and you can find it on the Born Pretty website here! Look at all those awesome designs. I also really like the Escher-like designs running along the middle of the plate!

[Tip to base: Hit the Bottle Blue Kamikaze, Hit the Bottle Purple Hooter,
Chi Chi Fluoro Pink, Ulta3 Atomic OJ, Hit the Bottle Bumble Bee]
My base from last week is a gradient of Hit the Bottle Blue Kamikaze, Purple Hooter, Chi Chi Fluoro Pink, Ulta3 Atomic OJ, and Hit the Bottle Bumble Bee.

[Stamping polish: Hit the Bottle As Black As Night;
Stamping plate: Born Pretty Geometry L002]
I chose the design fourth from the left on the bottom row because I thought it really suited the sunset landscape theme I had going!

[Stamping polish: Hit the Bottle As Black As Night;
Stamping plate: Born Pretty Geometry L002]
Using a plain black creme stamping polish (Hit the Bottle As Black As Night), I stamped every alternate nail with this design. I'm so impressed by how well the thin parallel lines were picked up!

This is such a great plate! I think all the designs on it are quite useable. You can check it out here, and as usual our code can be used on full priced purchases on Born Pretty. Happy stamping!


May 13, 2019

Sunset Stripe - Hit the Bottle Blue Kamikaze, Purple Hooter, Bumble Bee; Chi Chi Fluoro Pink, Ulta3 Atomic OJ


My natural nails have grown out quite a bit so seeing as I had a bit more real estate to play with, I decided to do a gradient mani!

[Dust storm]
My initial idea was a sponge mani, but after rummaging around, I found that I have a healthy collection of jelly polishes that would work perfectly for a layered gradient.

Here's what I used: From left to right, Hit the Bottle Blue Kamikaze, Hit the Bottle Purple Hooter, Chi Chi Fluoro Pink, Ulta3 Atomic OJ, Hit the Bottle Bumble Bee.

[Tip to base: Hit the Bottle Blue Kamikaze, Hit the Bottle Purple Hooter,
Chi Chi Fluoro Pink, Ulta3 Atomic OJ, Hit the Bottle Bumble Bee]
I started out with a full coat of Hit the Bottle Bumble Bee, then painted the next 4/5 of the nail with Ulta3 Atomic OJ, the next 3/5 with Chi Chi Fluoro Pink, 2/5 with Hit the Bottle Purple Hooter, and finally the last 1/5 with Hit the Bottle Blue Kamikaze.

[Tip to base: Hit the Bottle Blue Kamikaze, Hit the Bottle Purple Hooter,
Chi Chi Fluoro Pink, Ulta3 Atomic OJ, Hit the Bottle Bumble Bee]
I'm quite pleased with this one, it's a bright pop of colour as Sydney is cooling down for autumn/winter. Picking my shades, I was trying for a sunset to night sky gradient. Although the tips turned out a little bit too dark for a gradual gradient, I think it gives a nice accent this way!


May 10, 2019

Starry Horizons - Born Pretty Holo Thermal Top Coat, OPI Can't Find My Czechbook

Today, I have a top coat colour changing nail polish from Born Pretty to review.

[Starry Horizons]

[Born Pretty Holo Thermal Top Coat &
OPI Can't Find My Czechbook]
This is Born Pretty' Holo Thermal Top Coat, which is basically a top coat with holo microglitter, that goes black when cold and goes a translucent light gray when warm. I chose OPI's Can't Find My Czechbook as my base coat, which is a faded blue creme polish.

[Top Coat: Born Pretty Holo Thermal Top Coat
Base Coat: OPI Can't Find My Czechbook]

With the Holo Thermal Top Coat applied over OPI's Can't Find My Czechbook, my nails looked like I had on a French manicure where it was mostly a dusky blue with black tips, and holo microglitter running through it. It's getting cold where I am and the thermal polish worked beautifully, maintaining the dual colour easily. I love the versatility of this top coat, because it can create a different look just by having a different base colour. My only one complaint would be how strongly it smells in a somewhat unpleasant way.

Here's how the nail polish looked when completely warm or cold.

[Top Coat: Born Pretty Holo Thermal Top Coat
Base Coat: OPI Can't Find My Czechbook]
None of these states were maintained for long. I had to run my nails under warm or cold water to achieve the look. Most of the time, the mani looked like the first photo, which I much preferred.


If you're interested in the Holo Thermal Top Coat, you can find it here, and you can get 10% off with our code for other full price items at Born Pretty.

May 6, 2019

Hearts on Sleeve - Dance Legend Danger Danger, Hit the Bottle Snowed In, Born Pretty Valentines' Day L008


I have a few lovely stamping plates from Born Pretty to review, so here's the first one...

[Hearts abound]
Haha, red + hearts...! Nothing too innovative here but it's a classic combination for a reason! 

[Bottle to nail: Dance Legend Danger Danger (2 coats)]
My base shade from last week is Dance Legend Danger Danger, a raspberry-tinged red scattered holo.

[Born Pretty Valentine's Day L008]
The plate I'm reviewing today is Born Pretty Valentine's Day L008. Look at all the adorable patterns on this plate! I ended up using the one on the bottom left.

[Base: Dance Legend Danger Danger (2 coats); Stamping: Hit the Bottle Snowed In;
Plate: Born Pretty Valentine's Day L008]
Using a white creme stamping polish (Hit the Bottle Snowed In), I stamped that pattern on. These stamping patterns are fairly large which is great for wider/longer nails. My nails are pretty narrow but currently my natural nails are quite long, so I got a decent amount of hearts on!

[Base: Dance Legend Danger Danger (2 coats); Stamping: Hit the Bottle Snowed In;
Plate: Born Pretty Valentine's Day L008]
I'm pretty happy with this. It was certainly a gentle way to ease back into regular manicures!

Once again you can find this plate here. As always, our code above will give you 10% off full priced items at Born Pretty.

May 2, 2019

Endgame - hēhē, Hit the Bottle, MdU, Sally Hansen, Ulta3, OPI, Savvy

This is a tribute to Avengers: Endgame, the 22nd movie and the climax to the Infinity Wars storyline in MCU. I won't spoil anyone, but I loved the movie! I wore this mani when I went to watch the movie, and I'm so happy that I did this for Endgame.

[Stars & Stripes]
[Red & Gold]

Let me go into more detail with each one now!

[hēhē's Super Hero 001 stamping plate]

[Captain America]
This mani is a tribute to Captain America, all very red, blue and white. The forefinger and ring finger are stamped using hēhē's Super Hero 001 stamping plate. I stamp all of them onto a silicone stamping mat and then...well, I transfer onto my nails, but as you can see, I embarrassingly applied the 'A' incorrectly on my forefinger. It's flipped. /o\ Ah well... For the ring finger, I stamped the stars and stripe twice, and then colour in the red stars.

The shield is not stamped, it's hand drawn. The reason is because the way the stamping plate has the rings and stars, it's not possible to colour them in correctly based on Cap's actual shield. It bothered me the last time I used the Super Hero 001 plate, so I decided to hand draw it this time round. Honestly? REGRET. SO MUCH WORK. Hahaha... it was way too hard getting it kind of circular, next time, I'm just stamping it even if it's incorrect. On my pinkie finger, it's a hand drawn red, silver and blue stripes.

For the base nail polish colours, I used Sally Hansen Right Said Red + Ulta3 English Rose to get that red colour, Sally Hansen Pacific Blue for the blues, and OPI Unfrost My Heart for the silver that I hand drawn. For the forefinger and ring finger, I stamped using Hit the Bottle Chromeo, a chrome silver stamping polish.

[hēhē's Super Hero 002 stamping plate]

[Iron Man]
And now this tribute is to Iron Man, all red and gold. All of it is stamped from hēhē's Super Hero 002 stamping plate. Hey, I got the 'A' correct this time, haha!

The base nail polishes are Sally Hansen Right Said Red + Ulta3 English Rose to get that shade of red, and Savvy's Ginger Ale which is a gold glitter polish. For the stamping polish, I used Hit the Bottle Chromeo, a chrome silver stamping polish for the 'A', MdU Reddish which is a red stamping polish for the middle finger, Hit the Bottle's Spun Gold for the chrome gold on the ring finger, and Hit the Bottle's A Bolt from the Blue for the chrome blue of the arc reactor.  I just really love the Iron Man helmet on the middle finger, very iconic.

Anyway, I got many comments on this in person, which was kind of nice because I really wanted something to commemorate this movie. :)