In this post, I'll cover off where we bought the new Sally Hansen Gem Crush collection on discount and the different brushes Sally Hansen offers, but let's start off with the swatches for Showgirl Chic from the aforementioned collection!
 |
| [Sally Hansen Showgirl Chic, from the Gem Crush collection] |
I'm easily entertained so I was quite amused by how the word 'crush' looks all squishy and crushed under the word Gem on the bottle. The plish in the bottle looks impressively shiny and it doesn't disappoint on nails.
 |
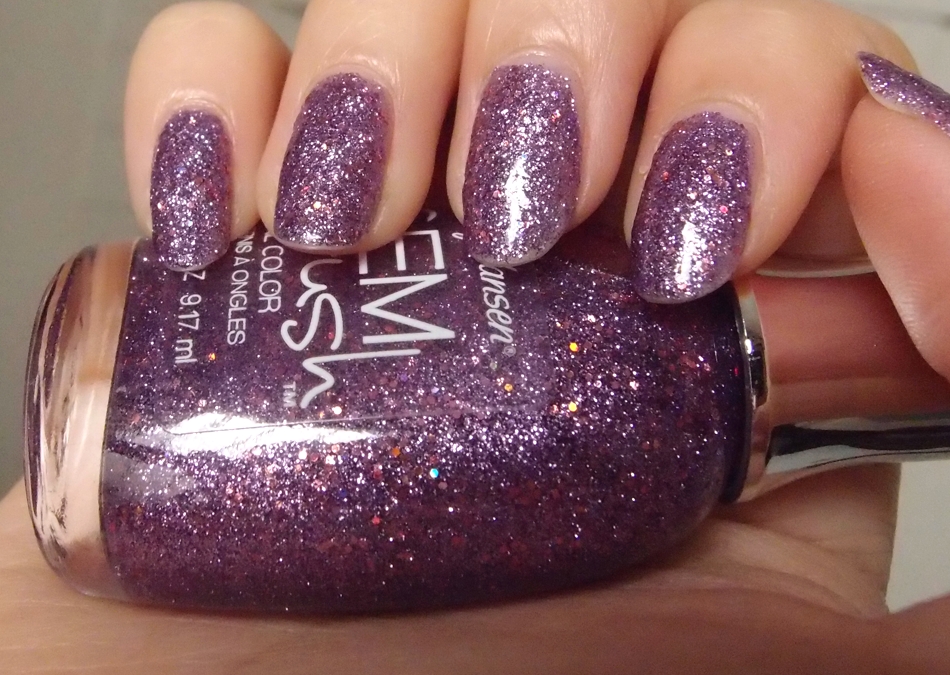
| [Sally Hansen Showgirl Chic, from the Gem Crush collection] |
This is so brilliantly gorgeous in person. I love how shiny it is. Showgirl Chic from Gem Crush is a dense silver glitter with sparse, very small, blue hexagonal glitters. The scattering of blue hex glitter makes the bright silver base look colder, showier and that much more interesting.
It took two to three coats to be completely opaque.
 |
| [Sally Hansen Showgirl Chic, from the Gem Crush collection] |
Mm, I think silver manis go well with my skintone.
I decided to use my iPhone to photograph this, because it really excels at being just that little bit out of focus so that the real shininess of the polish comes through:
 |
| [Sally Hansen Showgirl Chic, from the Gem Crush collection] |
Now isn't that lovely?
An issue I noticed with Showgirl Chic is that the blue hex glitters are much sparser compared to the silver glitter, so the distribution on nails can be a little dodgy sometimes. I found that there tended to be more blue hex glitter towards my cuticles with barely any on my tips. It was probably due to how I drag the brush as well.
Thankfully, with glitter polish, you can be a little more 'creative' with the application. All I did was dip the polish in again and if there was more blue on the brush, I would just spread them across the tips so that I had a more even distribution.
I have Be-Jeweled as well from Gem Crush and I didn't have the same issue with it. The pink-orange hex glitters were spread more evenly across the nail, and I think it's due to the fact that Be-Jeweled clearly have more hex glitter than Showgirl Chic does. You can see for yourself below by clicking on the photo for a closer look:
 |
| [Sally Hansen Showgirl Chic and Be-Jeweled] |
Sally Hansen Brushes
Other than the distribution of different-coloured glitter, you might have also noticed that the lids for Showgirl Chic and Be-Jeweled are different. The lids are actually random across the Gem Crush collection, and you can choose whichever lid you prefer.
A straight lid (Showgirl Chic, in this case) has a shorter and thicker brush, while a curved lid (Be-Jeweled), has a longer and thinner brush. I can honestly say that Showgirl Chic felt like it was harder to apply while Be-Jeweled definitely went on with a bit more ease. Perhaps it's personal preference, but I thought the thicker and shorter brush was harder to wield and made the plish gloopier.
Sally Hansen Discount!
As for where we got the Sally Hansen's Gem Crush... Well, it's no big secret actually. We got them from Priceline, which has a 20% discount off all Sally Hansen products right now! So don't miss out on it! I find that when it comes to new Sally Hansen nail polish, that's the lowest they usually go for. Priceline occasionally has 20% off Sally Hansen so it's a good place to keep an eye on.
If you have found a better place to get new Sally Hansen nail polish, please comment or message us with the deets, because I would love to get a chance to buy more Sally Hansen products at a lower price! :P